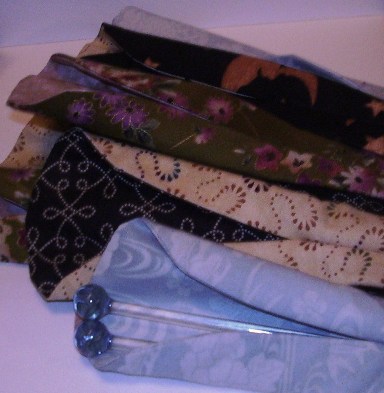
This is a most auspicious occasion, being my first real tutorial and all that jazz. Here is the highly anticipated Needle Kimono Tutorial with step by step instructions (I’ll try to get the photos in soon). I promise you, though, it is very easy and you will be whipping these out like no body’s business. Moving on…
You will need
(2) Fat quarters. One being the exterior fabric, the other is your lining fabric. These two fat quarters will make six Needle Kimonos if you cut carefully (for the not so fabric savvy, a fat quarter is a 18 by 22 inch piece of fabric and can be found in any fabric/quilting shop, the remnants bin is a good place to look as well). Always pre-wash and press your fabrics.
Thread to match exterior fabric.
Scissors
Template plastic (or just a piece of paper)
Washable fabric pen or chalk
Straight pins
Iron
Crochet hook (but you won’t be crocheting with it)
Making the template: Okay, getting down to business, with your template plastic/paper and using the crude rendering as a guide, draw out this beaver tail shape:
My template measures 2.5 inches wide on the flat bottom section; its long sides measure 12 inches before curving around and it’s width expands to 4 inches at it’s widest point (at the curve); at its longest point, the template measures 14 inches. Cut out your template.
Cutting: With fabric wrong side up, use your template to trace out six beaver tails from each fabric (twelve total) and cut.
Lining your Needle Kimono: With one beaver tail of each fabric, your exterior and lining fabrics, place together, right sides facing, and pin. You will be leaving the flat, short end open. Starting 1/4 inch from the bottom corner, sew up along the side, around the top (pivot fabric as needed), and down along the other side, stopping 1/4 inch from the end. Press flat. Fold in the open bottom seam allowance and press.
Seaming: With wrong side facing out (so, lining on the outside), fold the beaver tail in half and pin along edge. Use your fabric pen to make a mark about 10 inches from the bottom. Starting at that point, edge stitch (as in, stitch very closely to the edge, careful to stitch through all thickness) down the length of the seam.
Turning out: This is where the crochet hook is handy. Using your crochet hook (I found that a 6mm works best), stick the hook in the top and out of the open bottom. Hook the fabric and gently pull the Needle Kimono right side out. Press flat.
Closing the bottom: Edge stitch along the bottom through all thickness.
Now you can wrap your prized needles in the softness of your very own, hand made Needle Kimono. Pour yourself some sake and then make the other five Needle Kimonos for your friends.
A word on copyright. These things I’ve designed are for personal and non-profit use only. Make them for yourself, make them as gifts, or make them for charity fund raisers/auctions. You may not sell items made from my patterns and you may not sell or give out these patterns in your store in order to sell your merchandise. Do not reprint this pattern any where else. Think karma. Any questions, just ask.


thank you for sharing your pattern! may need to make some soon.
I’m so happy you share the pattern, I just love it. You’re great! Wishing you the best for 2008. Pia